Thalipeeth – The Maharashtrian Delight
Thalipeeth in the past had one specific recipe. Now, there are many recipes that build on or alter the original to suit for taste and nutritional reasons. The typical thalipeeth is made with bhajani. Bhajani is made with bajri (millet), wheat, Harbhara daal (split Bengal gram), Urad daal (Split black gram), Jwari (Sorghum), sometime Tur daal (Split pigeon peas) etc. This combination is sure to raise the acidity for some… Make bad GERD worse if eaten before sleeping!
IMHO: The past generations did a lot of physical work and travel. And so their digestion capacity was definitely better than this generation’s. So were their times of consuming food. Most grandparents still continue to eat before 7:30pm and continue to have better metabolisms. The original thalipeeth that follows the technically correct recipe was popular because of the taste, ease of making and the last generation’s good digestion! You eat it late or in a large quantity, and you are sure to get acidic response. There’s another recipe here. Delicious and healthy!
The customisation
I usually follow this simpler method I learned from my mother. This is the healthier, high protein, high fiber version for this decade and next ones. It is also convenient and can be made with ingredients that can be store bought so it does not require a lot of pre-planning. If you taste the original thalipeeth, then the taste of this one pales! But I’d still recommend this thalipeeth over the original recipe. Made mainly with sorghum, this one is also a tasty treat! You can add leftover vegetables, daal or curd to the dough to make the thalipeeth “Khuskhushit”… Customizations as per your family taste will get you the version you love.
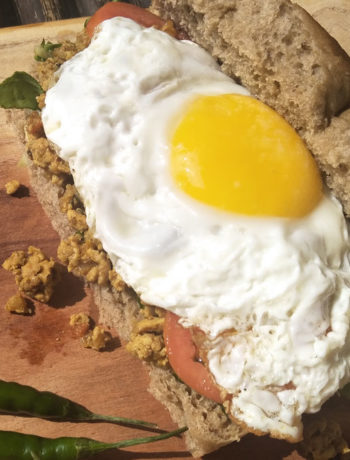
Served hot with a dollop of homemade white butter or curd and lemon pickle, this one is sure to get on your weekly dinner menu fast! With the current availability of fusion ingredients, my son loves this with schezwan chutney or even tomato ketchup for accompaniments… To each his own I say! No judgments 😉
When I read Dushyant’s recipe of Koki… I marveled at how similar it is to our Maharashtrian Thalipeeth. There are definitely some differences between the two. Oh, I plan to make Koki sometime. In the meatime, here’s my recipe of the Thalipeeth that is on the dinner menu at least once every week.
Once you start making them, make sure you catch up on a TV show, or bring a chair in the kitchen… It takes about 3-4 minutes per thalipeeth. If you make them in small to medium size, a regular eater is sure to eat 2… And the big eaters can pull off 3 and a half!
Thalipeeth recipe
Print RecipeIngredients
- 3.5 bowls sorghum floor (jowar floor)
- Half a bowl gram flour (besan)
- Optional: Half a bowl corn flour (maka)
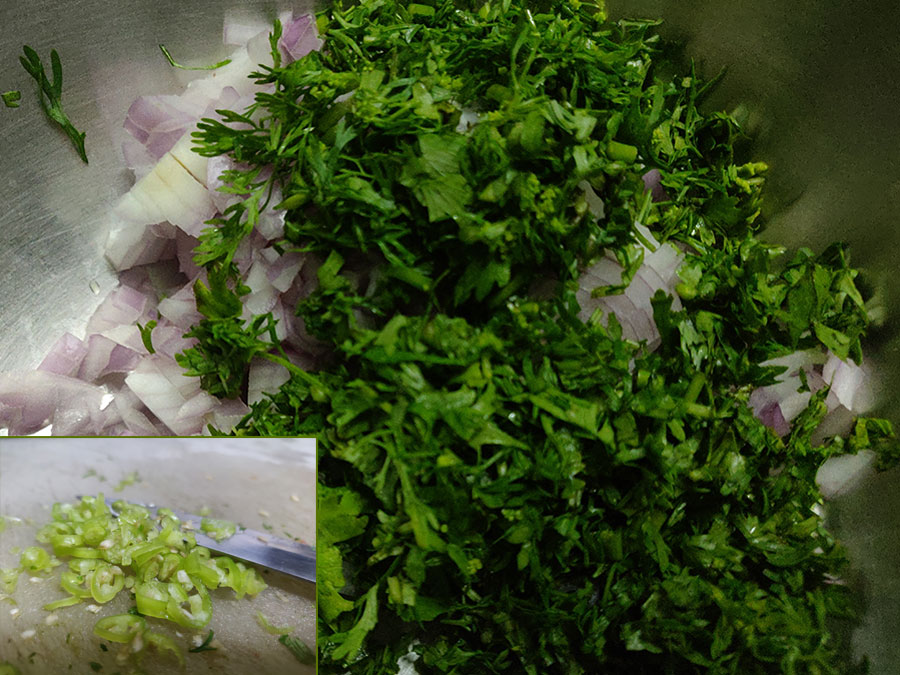
- 2 medium size onions – finely chopped
- Large bunch fresh coriander – finely chopped
- Optional: grated carrot, finely chopped tomato, grated cabbage, leftover daal, leftover rice, leftover vegetable – smashed… These make it some extra tasty
- Optional: 2 spoons ginger garlic paste
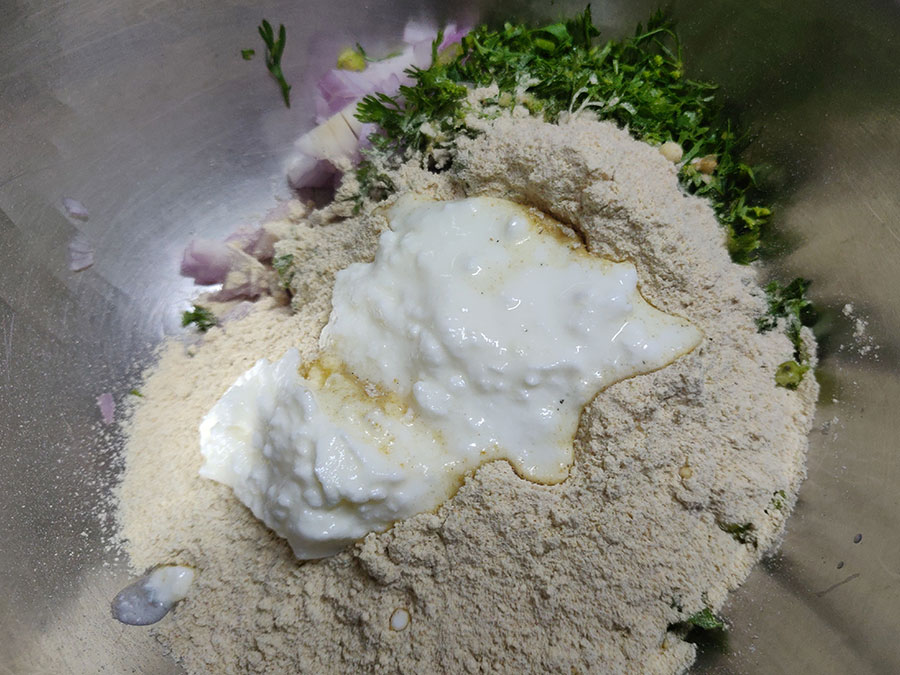
- Curd – 2 tablespoons (You may skip the curd if you are adding any leftovers)
- 2 green chillies – finely chopped
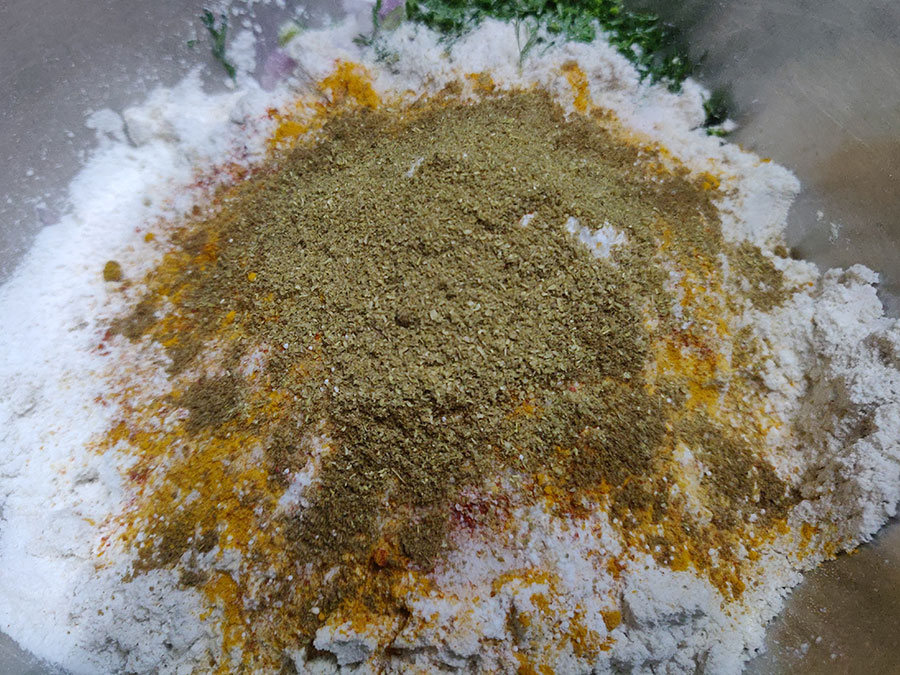
- 2 spoons cumin powder
- 2 spoons coriander powder
- 1 ½ tea spoon turmeric powder
- ½ tea spoon red chilli powder
- Oil – a tea spoon per thalipeeth
- Water – for making dough
- Salt to taste
Instructions
Add the vegetables, jowar – besan – maka flours, leftovers, spices, and curd in a large bowl
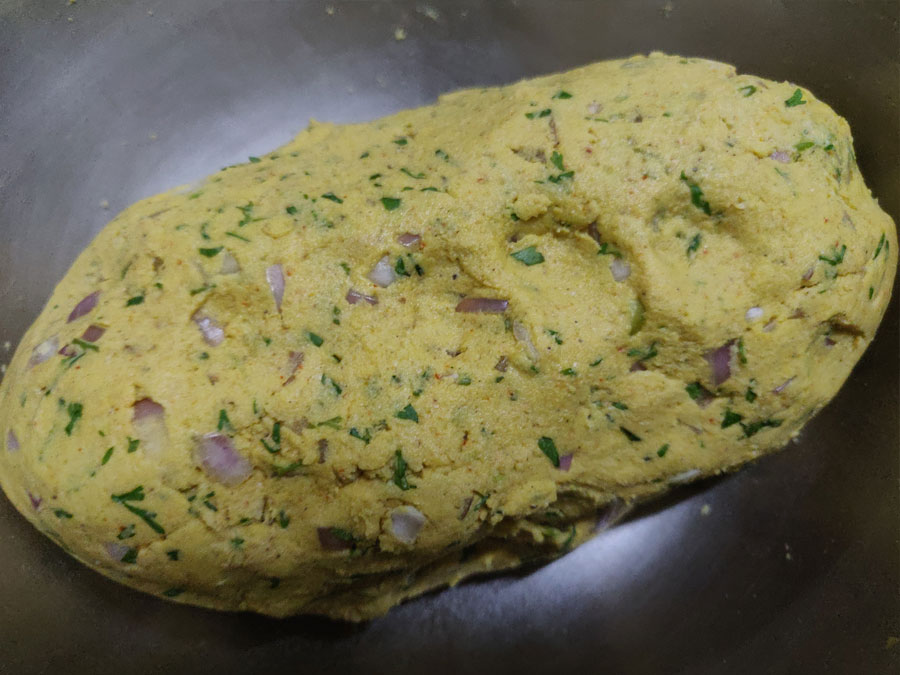
Knead medium (not too soft) dough by adding water as required
Oil the regular pan or use a non stick pan to reduce oil use
Take dough enough to fit in your hand. Make a ball of it.
Flatten it out on a clean plastic sheet in a circle. You may also directly flatten it on a cold pan. Plastic sheet works better for the next thalipeeth onwards as the tawa is hot after the first thalipeeth.
Wet the hand with water or oil to avoid the dough sticking to your hand.
Keep flattening using your hand and fingers.
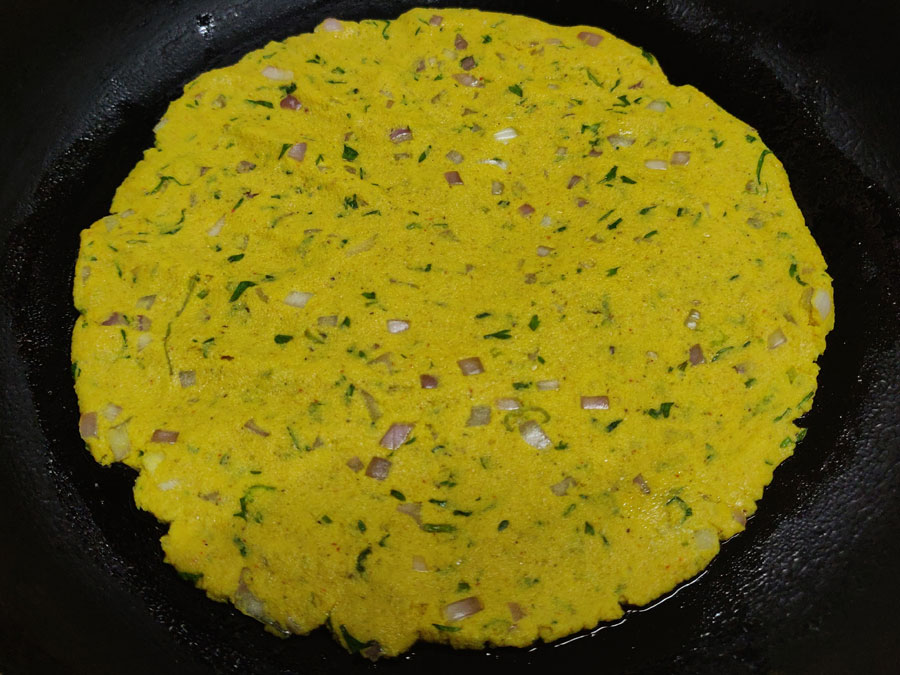
Make a beautiful circle of dough about 3 to 4 millimeters in thickness. Too thin and it will break while trying to transfer… Too thick and the thalipeeth may not cook nicely.
Transfer it to the pan.
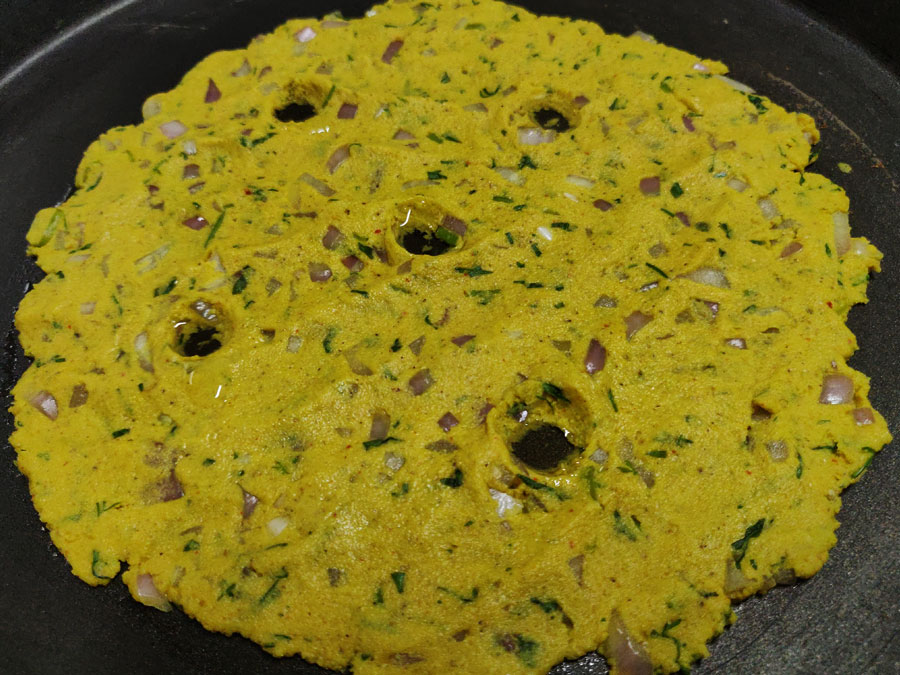
Make holes on the laid out thalipeeth… 1 in the center and 4 at equal distance on the sides. You can see this done in one of the pictures at the bottom.
Add few drops of oil in each hole. This will help it cook nicely.
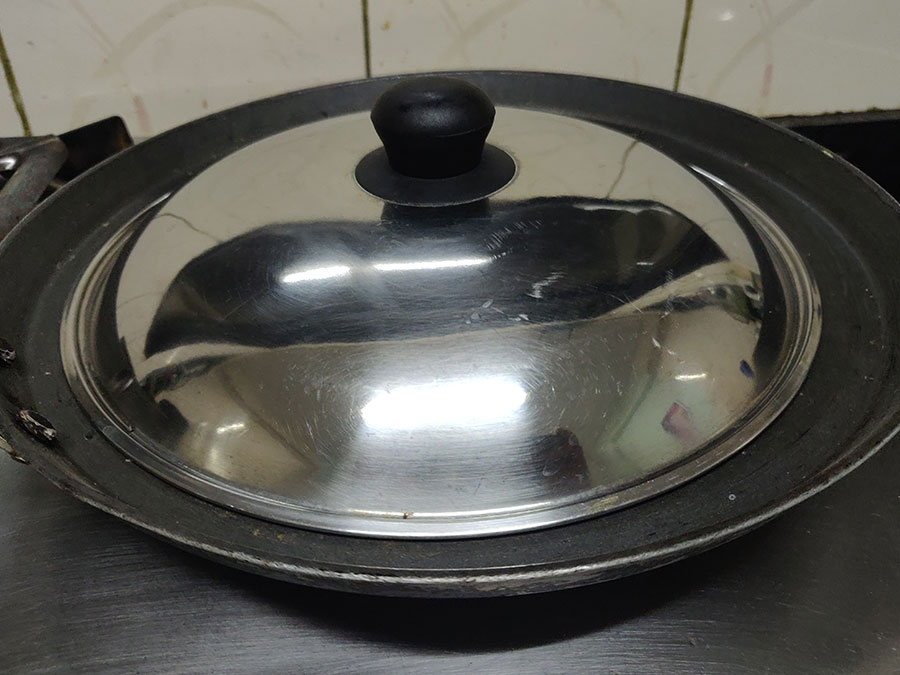
Put the pan on stove on high flame. Cover the pan and fry for about a minute. Keep checking to avoid burning.
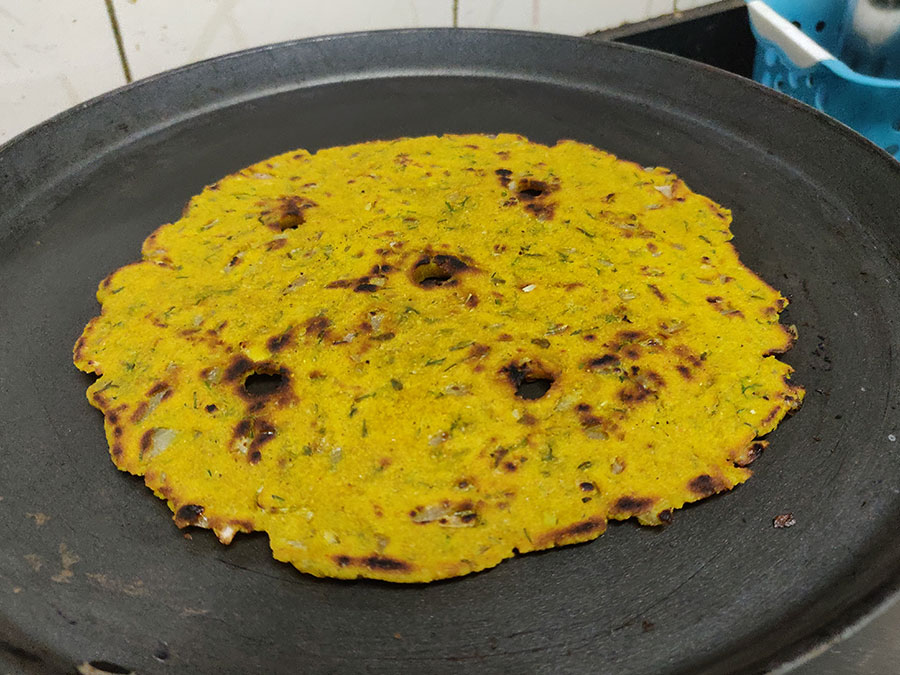
Once the bottom side is done, reduce the flame. Flip the thalipeeth to fry on the other side and take off the cover. The thalipeeth must already be cooked. So the reverse frying is only to bring about nice color.
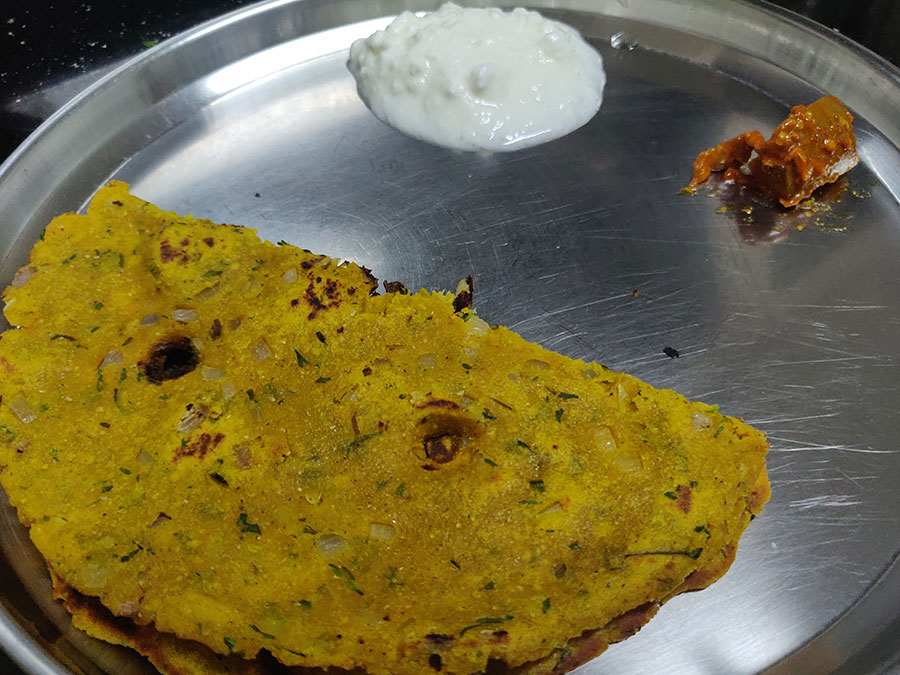
Take it off the stove… Cut in half and serve with a dollop of white butter on top or curd and pickle on the side.